Grant Runner Sponsor Budget Map
This page contains the following sections.
Overview
The Sponsor Budget Map page shows where the expenses from your connected SAGE Budget will flow to on the RR Detailed Budget form.
A link to the Sponsor Budget Map page will appear on the left navigation menu once you connect your SAGE Budget to your Grant Runner application and the RR Detailed Budget form is either mandatory for your opportunity, or you have selected it.
Use the Sponsor Budget Map page when you have expenses that are not mapped to default fields on the RR Detailed Budget form, or you need to adjust the defaults. A red exclamation “validation icon” will display if you need to complete any mappings.
Note: The Sponsor Budget Map page does not show dollar amounts. It shows you how the various expenses on your budget are categorized for the RR Detailed Budget form. For some expenses, you can use the Sponsor Budget Map to change where and how your data displays on the RR Detailed Budget form.
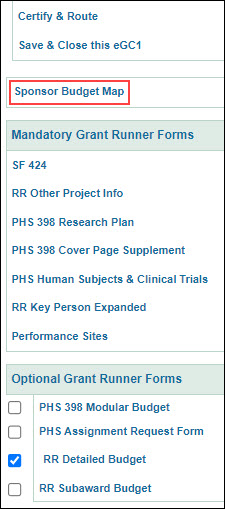
The following image shows the Sponsor Budget Map link on the left navigation menu.
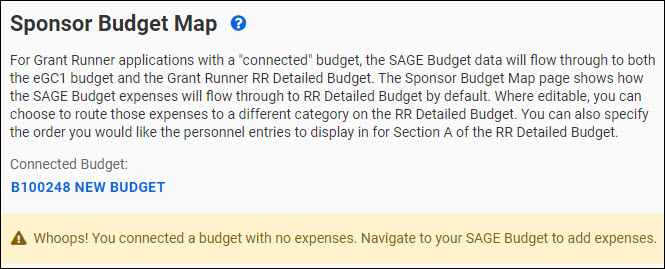
Note: If the budget you connect does not yet contain any expenses (costs), you will see an alert message. It reads “Whoops! You connected a budget with no expenses. Navigate to your SAGE Budget to add expenses.”
The following image shows the message.
Data Synchronization
After the initial connection of your SAGE Budget and Grant Runner application, any data changes you make to your SAGE Budget will be synchronized with both the RR Detailed Budget form and Sponsor Budget Map page. Any changes you make on the Sponsor Budget Map page will be reflected on the RR Detailed Budget form when you view it.
Your data changes will also be reflected in the PDF generated when you select View Grant Runner forms (PDF) on the left navigation menu.
Using the Sponsor Budget Map
The Sponsor Budget Map page initially shows where the SAGE Budget expenses will appear, by default, on the RR Detailed Budget. Where editable, you can choose to shift those expenses to a different category on the RR Detailed Budget. You can also specify the order of the personnel entries for Section A. Senior/Key Persons.
The Map page includes a link to your budget, just above the first section, that displays the budget number and title. For example: “B32836 Guide: Example Budget” as shown in the following image.
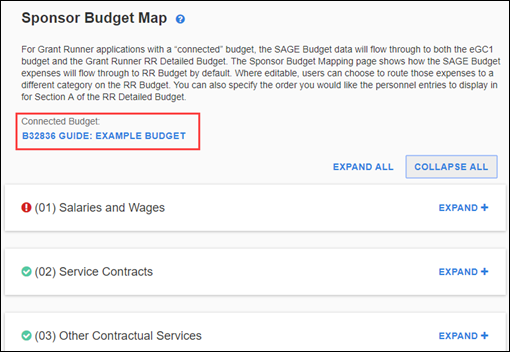
Below the link, there is a section for each expense type (object code) on your connected SAGE Budget. By default, the sections are all collapsed when you first view the page. You can “Expand All” sections or just individual ones.
The sections you see will match those where you have entered data in your parent SAGE Budget and any sub budgets. The possible sections are:
- (01) Salaries and Wages, which includes the (07) Retirement and Benefits data (this links to a separate article)
- (02) Service Contracts
- (03) Other Contractual Services
- (04) Travel
- (05) Supplies and Materials
- (06) Equipment
- (08) Student Aid
- (10) Capital Projects
- (38) Unallocated
- (25) Facilities and Administrative
- Participant/Trainee Support Costs
General Section Layout
SAGE Budget data is displayed on the left side of the page, in the same order as your SAGE Budget. The RR Detailed Budget expense category to which the expense will be mapped is shown on the right side.
Each section will display a status icon to indicate the status of the data within the section. A red exclamation point indicates that there are one or more expenses from your SAGE Budget that you need to map to an RR Detailed Budget category or sub-category. A green check mark indicates that all mappings are resolved. The Participant/Trainee Support Costs section shows a gray check mark icon if one or more of the optional mappings are unresolved.
The following images show examples of each type of status icon: green, red, and gray.
![]()
![]()
![]()
Adjust Expense Categories
You can change a number of SAGE Budget expense categories from the default value to another category on the RR Detailed Budget. Use the drop-down menus in the right-hand column to make changes to the default mapping between SAGE Budget and the RR Detailed Budget form. Some selections are grayed-out to indicate that the SAGE Budget object code cannot be mapped to that selection. For example, Travel costs cannot be assigned to Other Personnel.
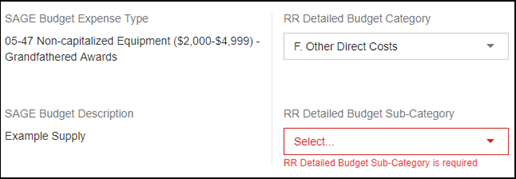
Create Customized Categories
For some expenses that map to Section F: Other Direct Costs, there is no default sub-category. You must make a selection. These expenses are:
- Supplies & Materials 05-47, 05-48
- Student Aid 08-00, 08-02, 08-05
- Unallocated 38-00
You can either select one of the existing sub-categories, or create a customized one. You can add up to 10 custom (user defined) sub-categories for Section F. The custom fields will be listed in object code order on the budget form.
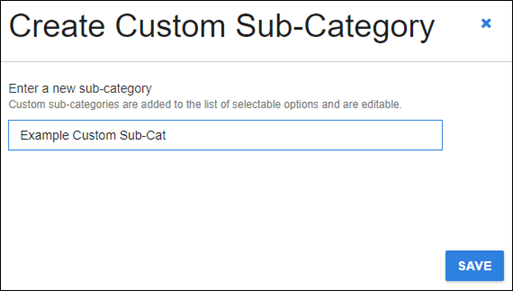
Click on “Select…” in the drop-down menu and choose “Other…” You made need to scroll down the list.
A dialog will display where you can enter the customized name of your sub-category. Click Save to return to the Map page. The new sub-category will appear, followed by an Edit link.
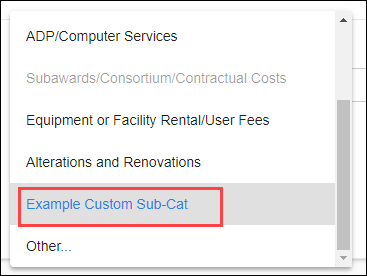
Once you have added a customized sub-category, it will appear in the drop-down so that you can choose it for additional expenses. If you edit the name of your customized sub-category, all items you associated with that sub-category will be updated.
Participant Support Costs
You can change some SAGE Budget expense items from the default mapping value to Section E. Participant/Trainee Support Costs.
Note: If you have any Participant Support Costs, you must use the section at the end of the Sponsor Budget Map page to indicate the associated numbers of participants for those budget periods.
(01) Salaries and Wages
This section has some unique characteristics, so it is described in its own article Sponsor Budget Map: (01) Salaries and Wages.
(02) Service Contracts
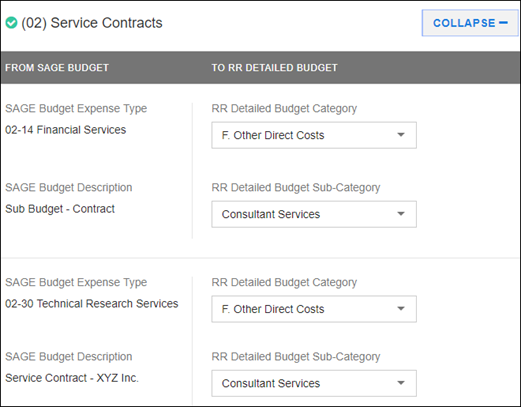
- By default, the expenses for this object code, on a parent budget or internal sub budget, will map to Section F. Other Direct Costs, subcategory Consultant Services.
- You can change the RR Detailed Budget Category to either D. Travel, or E. Participant/Trainee Support Costs.
- Within this category you can select the appropriate subcategory for your expense item.
(03) Other Contractual Services

- By default, the expenses for this object code, on a parent budget or internal sub budget, will map to Section F. Other Direct Costs. The default subcategory depends on the SAGE Budget sub-object code for the expense. Consult the table below.
- Generally, you can change the RR Detailed Budget Category to either D. Travel, or E. Participant/Trainee Support Costs. The exception is an 03-62 expense, a subcontract sub budget. You cannot change its mapping.
| SAGE Budget Sub-Object Code | Default RR Detailed Budget Subcategory |
|---|---|
| 00, 01, 02, 08, 11, 12, 13, 19, 20, 21, 23, 25, 26, 28, 29, 33, 34, 35, 39, 40, 41, 42, 43, 44, 47, 48, 49, 50, 51, 53, 56, 62, 64, 69, 71, 72, 92, 95, 99 | Subawards/Consortium/Contractual Costs |
| 04, 06, 14, 22, 45, 46, 57, | ADP/Computer Services |
| 24, 27, 30, 32, 36, 37, 38, 75 | Custom – entered by user |
| 58, 59 | Publication Costs |
| 60 | Alterations and Renovations |
| 80, 81, 85, 87, 89, 91 | Equipment or Facility Rental/User Fee |
(04) Travel
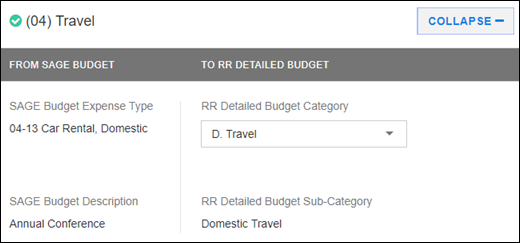
- By default, the expenses for the (04) Travel object code, on a parent or internal sub budget, will map to Section D. Travel on the RR Detailed Budget form. The expense will map to either Domestic Travel Cost or Foreign Travel Cost, depending on your SAGE Budget Destination choice.
- You can change the RR Detailed Budget Category to E. Participant/Trainee Support Costs. The subcategory will default to Travel.
(05) Supplies & Materials
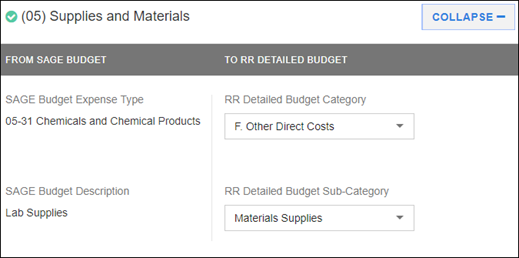
- By default, the expenses for this object code, on a parent budget or internal sub budget, will map to Section F. Other Direct Costs, with the subcategory of Materials Supplies.
- You can change the RR Detailed Budget Category to E. Participant/Trainee Support Costs, except for sub-object codes 47 and 48 “Non-Capitalized Equipment”.
- Within the category you can select the appropriate subcategory for your expense item.
(06) Equipment
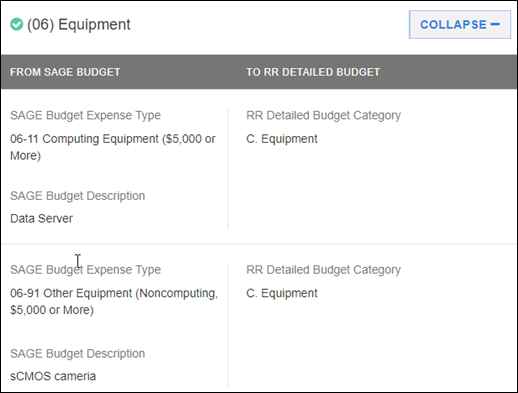
- The expenses for this object code, on a parent budget or internal sub budget, will map to Section C. Equipment, and you cannot change the mapping.
- Additional Equipment Items Attachment
- Section C. Equipment on the RR Detailed Budget form can display up to ten items. Any additional items must be included in an attachment to the form. When you initially connect your SAGE Budget and Grant Runner application, SAGE will automatically generate and attach the PDF file listing any additional equipment items, as needed. The file will be named to reflect the budget period. For example, the attachment for Period 3 of your budget will be named “Period_3_Equipment.pdf”.
- Any time you add or remove equipment items from your SAGE Budget, the PDF attachment will automatically be recreated (or removed) to reflect those changes, as needed.
(08) Student Aid
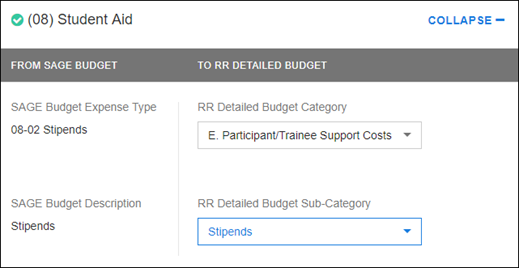
- By default, the expenses for this object code, on a parent budget or internal sub budget, will map to Section F. Other Direct Costs. You will need to select a sub-category on the Sponsor Budget Map page, or create a custom one.
(10) Capital Projects
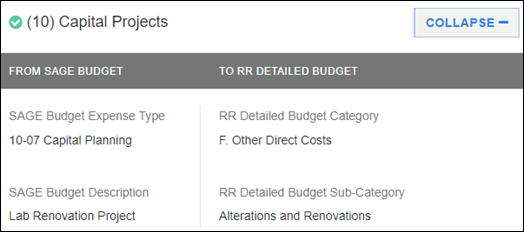
- The expenses for this object code, on a parent budget or internal sub budget, will map to Section F. Alterations and Renovations, and you cannot change the mapping.
(19) APL

- The expenses for APL Prorated Direct Costs (PDC), on a parent or internal sub budget, will map to Section H. Indirect Costs
- The non-PDC expenses will map to section F: Other DIrect Costs. You will need to select a sub-category on the Sponsor Budget Map page, or create a custom one.
(38) Unallocated
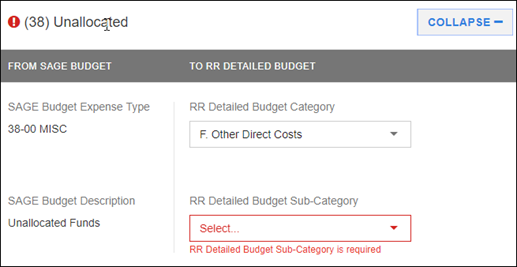
- By default, the expenses for this object code, on a parent budget or internal sub budget, will map to Section F. Other Direct Costs.You will need to select a sub-category on the Sponsor Budget Map page, or create a custom one.
- You can change the sub-category to any value for Section F, except Subaward/Consortium/Contractual Costs.
- You can also change the RR Detailed Budget Category to either D. Travel or E. Participant/Trainee Support Costs.
(25) Facilities and Administrative
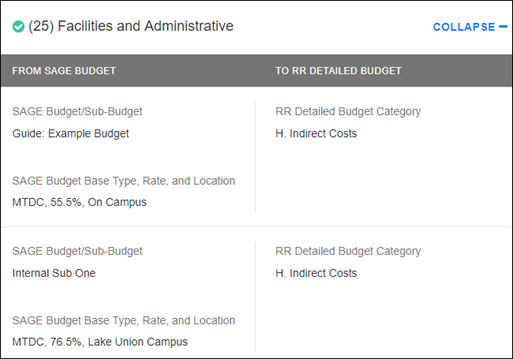
- The expenses for this object code, on a parent budget or internal sub budget, will map to Section H. Indirect Costs, and you cannot change the mapping.
- The RR Detailed Budget form allows a maximum of four distinct indirect cost base/rate rows.
Participant/Trainee Support Costs
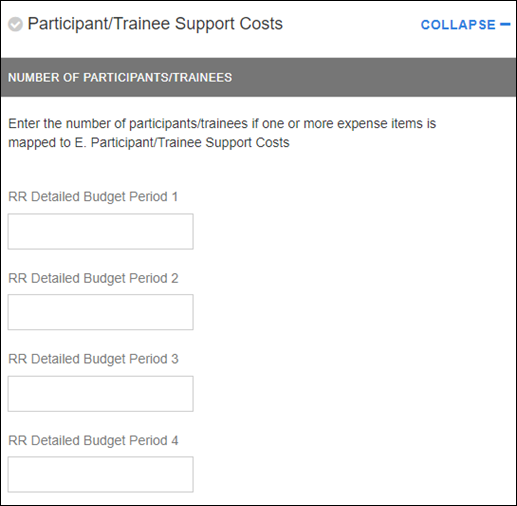
- Use this section to indicate how many participants and/or trainees there are for each period.
- There will be an entry field for each period.
- If there are not any participants in a period, leave the field blank.