Advance Comments & History
The Comments & History section displays entries for events in the advance request process. You can also add a comment at any time. The entries display in reverse chronological order, so the most recent one is first.
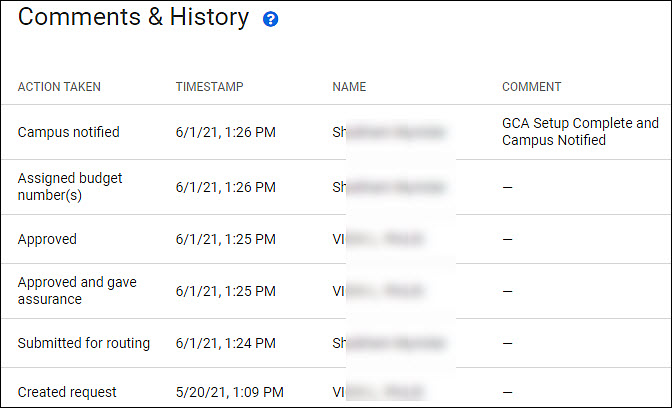
The following image shows an example of this page for a fully processed advance.
The table columns are:
- Action Taken – the event that created the entry; described in the following table
- Timestamp – the date and time of the event
- Name – the user whose action triggered the event or who manually added a comment
- Comment – the text of the comment, either system-generated or user-entered
Note: not all actions have comments. For those entries, a dash will appear in the Comment column.
When an advance is editable, you can manually add a comment by selecting the Add Comment button above the table, as shown in the following image.
![]()
A dialog will display. As you start entering your comment, the Add Comment button in the dialog will be enabled. Select it to save your comment. You can only delete your own manually added comments. Select the trash can icon to the right of the comment to remove it.
You can also add a comment from anywhere within the advance by selecting the “more actions” (3 stacked dots) icon at the far left of the header, and choosing Add Comment.
Event Entries
The system will add an entry for the events described in the following table. The “comment type” column indicates if there will be any comment text, and if so, whether it is system-generated or user-entered.
| History Event | Event Trigger | Comment Type |
|---|---|---|
| Created request | Clicking “Select” button next to eGC1 | (none) |
| Submitted for routing | Clicking “Submit & Route” button on Review & Submit page | System-generated |
| Resubmitted for routing | Clicking “Submit & Re-route” button on Review & Submit page after a return | User-entered and required |
| Delegated PI Approval | When PI node is approved | User-entered and required |
| Approved and certified | PI clicking “Approve & Certify” button in approval modal | (none) |
| Approved | Clicking “Approve” button on Request Summary page of routing advance | (none) |
| Returned | Clicking “Return Request” button in return modal of an advance | User-entered and required |
| Withdrawn | Clicking “Withdraw” button | (none) |
| Added ad hoc approver | Clicking “Add ad hoc Approver” button in add approver modal | User-entered and optional |
| Removed ad hoc approver | Clicking “Remove Approver” button on the ad hoc approver’s workflow graph node | User-entered and optional |
| Commented | Clicking “Add Comment” button on the Comments & History page, or by selecting “Add Comment” from the “more actions” menu in the advance header | User-entered and required (to complete process) |
| Assigned budget number(s) | GCA reviewer clicking “Assign Budget Number(s)” button | System-generated |
| Campus notified | GCA reviewer clicking “Assign Budget Number(s)” button | (none) |
| Extension requested | Clicking “Extend Advance” or “Request to Extend Advance” in the extension modal | (none) |
| Extension processed | GCA reviewer clicking “Mark Budget Updated” button in extension request alert | (none) |
| Extension denied | GCA reviewer clicking “Deny Extension” button in deny extension modal | User-entered and required |