Use this section to manage any additional attachments that explain your request. For example, timeline correspondences with the sponsor and notices of award.
Select the blue caret to the left of the File Name to see version information. The entry indicates this is Version 1, followed by the filename and attached date/time. Below that is a text field where you can enter an optional Version Comment, up to 255 characters. The following image shows the expanded view.
Replace Attachment
When your advance is in either Withdrawn or Returned status, you can update any attached files. In the table of attachments, the icon at the far right is a 3-dot more actions menu, in place of the trash can. The menu options are:
Replace file with newer version
Delete attachment
The following image shows the menu choices.
To replace a file, select that option from the menu. A dialog will display, as shown below, where you can upload the newer version of your file.
Once you have added the newer version, you can expand the row and add a comment for the revised file. The expanded view will show all versions of the attachment, with the most recently added version at the top. The following image shows an example.
Delete Attachment
When your advance is in Composing status, the icon at the far right of an attachment row is a trash can. Hovering your mouse over the icon displays the text “Delete file”. Select the icon to open the confirmation dialog.
When your advance is in Withdrawn or Returned status, a 3-dot more actions menu displays with an option of “Delete attachment” which opens the confirmation dialog.
In the dialog, shown below, select Cancel or the blue X to close it and retain the attachment, or select Delete File to remove the attachment.
Note: When you have an attachment with more than one version, choosing to delete will remove all versions.
A Principal Investigator (PI) or Research Administrator (RA) can request authorization to spend in advance of the receipt of an award or setup of an award in UW systems. The sponsor must allow pre-award funding and the department must guarantee these expenditures if an award does not come through. The UW authorizes advance spending through the assignment of an advance budget number.
The Cost Share section displays, by default, the F-3 question and current response from the associated application’s Budget & Fiscal Compliance page or the most recent response from a processed advance for the same associated application.
The following image shows this default view.
If the response to F-3 is “Yes”, a cost share addendum attachment is required.
Note: Renewal advances require a response to an additional question if F-3 is “Yes”: “Will there be any changes to cost share during the next budget period?” Review current cost share setup in the eFECS Cost Share Summary (ASTRA access required.)
If the response is “Yes” to changes, an updated cost share addendum attachment will be required. If the response is “No” to changes, the original cost share addendum attachment is required.
Select the Edit link to update the response. The link will change to a Done link, which when selected, will save any changes and return you to a read-only display of the data.
If you change the response from No to Yes, a Reason for change text box will display and you will need to upload an up-to-date cost share addendum, as shown in the following image.
The “Responses from older eGC1s & Advances” tab lists the associated application followed by the text “(Original Responses)”. The date the item was last edited displays on the next line. Selecting the application number will open it in a new tab.
Use the caret to the left of the application number to expand the section and see the question and response from the application.
This section allows you to manage who has access to your advance, and what level of access. The following image shows this section with some example data.
Access Roles
Roles with Owner permissions are listed first in the table, followed by any General Collaborators. The owner rows display in the following order: Advance Preparer(s), Budget Preparer (if applicable), eGC1 Preparer, Pre-Award Budget Contact, Administrative Contact, and Principal Investigator. All owner roles display even if there is no one assigned to that role. Collaborators will display in the order added.
By default, the person who creates the advance becomes the Advance Preparer. The other owners are populated from the associated application and from a connected budget, if applicable. An owner’s organization, email and phone information will display. Anyone with Owner permission can make changes to the advance. A new advance will not have any default collaborators.
A person may have more than one Owner role, but cannot be both an Owner and a General Collaborator. If you try to add an existing person in a role that would conflict, their name would appear grayed out in the search results.
Editing the Access List
Note: anyone who is an Owner or who has Can Edit permissions may update the Access & Roles page of an advance in any status.
Owners
To replace an existing owner, start typing the new person’s name or NetID in the Contacts column for that role, then select them from the results list. The one exception is that the Principal Investigator cannot be changed or removed.
Your advance can have more than one Advance Preparer. To add another, select Add Contact, then choose “Add advance preparer” from the drop-down menu. A new row will be added to the top of the table with the selected Role. Start typing the person’s name or NetID in the Contact column, then select them from the results list. After adding a person, you can use the Sort by Role link to re-order the list.
In addition, a Pre-Award Budget Contact or Administrative Contact can be either demoted to a general collaborator with edit permission or removed from the budget by using the “more options” menu icon to the far right (three vertical blue dots). Any time you choose “remove” from the menu, a confirmation dialog will display.
An Advance Preparer, if there is at least one other Advance Preparer, can be also be demoted or removed.
General Collaborators
To add a general collaborator, select Add Contact, then choose “Add general collaborator” from the drop-down menu. A new row will be added to the top of the table. Start typing the person’s name or NetID in the Contact column, then select them from the results list. After adding a person, you can use the Sort by Role link to re-order the list.
Use the drop-down menu in the Permissions column to give either View Only or Can Edit access. The default choice is View Only. You can change the access permission at any time. Anyone with Can Edit permissions can make changes to the advance.
General Collaborators can also be:
Promoted to be an additional Advance Preparer
Promoted to be the Pre-Award Budget Contact or Administrative Contact
if the contact role is empty, the collaborator is moved directly.
if the contact role is not empty, a confirmation dialog appears to confirm the replacement. The person being replaced is demoted to a general collaborator with edit permission.
All fiscally responsible organizations (Departments, Divisions, Sub-Divisions) selected on an advance request will need to have one or more people designated in ASTRA as an “Advance Reviewer” for the corresponding span of control (Organization Code). Division level reviewers will approve for Sub-Division organization codes. Department level reviewers can approve for division level organization codes, if no division level reviewer has been designated.
You can look up a unit’s ASTRA Authorizer using this tool on the ASTRA website. Select Organization and enter your unit’s 10-digit code.
All ASTRA Authorizers for existing SAGE Division Reviewer and Department/Center Reviewer roles have been granted authority to assign the new Advance Reviewer role.
Note: If an Advance Reviewer has not been designated, the Advance cannot begin routing for review. The ORIS Support Desk will be notified of missing reviewers and will help you resolve the issue. Once a reviewer is designated and approves the advance, the system will automatically route it to GCA.
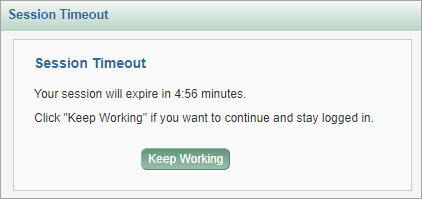
When you are logged in to SAGE, but have not been actively using the system for 40 minutes, a dialog message displays indicating that your session will expire in 5:00 minutes. The dialog will continue to count down the time. You have the option to click “Keep Working” to re-activate your session.
If you do not click “Keep Working”, then when the time count reaches zero (0) minutes, your session will expire. Your browser will be redirected to a “session expired” page from which you can log back in to the system you were using. Any unsaved data at the time your session expires will be cleared.
The SAGE system has always timed out after 45 minutes of inactivity. We have now made the timeout more visible so you know that your session has expired, instead of sending you to the tasklist with no explanation.
The following image shows the session timeout dialog, with the time remaining until expiration and the instruction to click “Keep Working” if you want to continue to stay logged in.
An Advance Budget Number Request is made for a specific eGC1. You must be an owner of the eGC1 or have Read/Write access to create an advance. The owners of an eGC1 are the PI, Administrative Contact, Pre-Award Budget Contact, eGC1 Preparer, and Budget Preparer (if the eGC1 has a linked budget). You can request access to an eGC1 from a current owner or someone with Read/Write access.
Global Editors
If your only access to an eGC1 is through the Global Edit ASTRA role, then you need to add yourself to the eGC1 first. Open the eGC1 (from the Approvals tab) and use the Contacts & Access page to assign yourself direct access (or change the preparer or a contact, if appropriate). You can then create an advance.
The steps to do this are:
Find and open the eGC1 on the Approvals tab.
Go to the Contacts & Assign Access page.
Click the Add Another User link in the Access section.
You can use any combination of the search criteria to locate advance requests to which you have authorized access. More specific searches will return fewer results. The criteria are described below.
The Reset link clears any values in the critera fields.
The following image shows the advanced search page.
Search Criteria
Field
Description
Advance Number
Enter the entire advance number with or without the preceding “ADV”.
PI Last Name
Enter all or the beginning of the last name or the last name plus first initial or the last name plus the first name. For example:
Smith
Smit
Smith, J
Smith, John
You must enter at least 2 letters.
Short Title
Enter any of the words or string of letters contained in the Short Title. You must enter at least 3 characters.
Budget Number
Enter all 6 digits with hyphen (##-####) of the budget number.
Sponsor Name
Enter any of the words or string of letters contained in the sponsor name. You must enter at least 2 characters.
eGC1 Number
Enter the entire eGC1 number, with or without the preceding “A”.
Org Receiving Funds
Enter the beginning portion or the entire organizational code as listed in the FIN Index. You must enter at least the first 3 numbers.
Results List
Once you have entered the search values, click the Search button to display all the matching advance requests. The number of results displays on the far right above the list.
The list contains the same columns as the My Advances page. To open an advance request, click on its number. The following image shows a partial results list.
The My Advance Requests page displays your existing advance requests, allows you to search for an existing advance or start a new request for an advance.
By default, the list displays advances in Composing, Returned, Withdrawn, and Denied statuses. You can use the status check boxes or the “select” links to filter which item statuses you want to display. The links are: Select Routing, Select Returned, Select All, and Default View.
The following image shows the My Advance Requests page header with the default statuses selected.
You can use the Advanced Search link to find advance requests that match specific criteria. The How to extend an Advance provides help on creating an extension. The Request Advance button starts the process of creating a new advance request.
The statuses for an advance request are:
Status
Description
Composing
Newly created, but not yet submitted for approval
Routing
Submitted and routing for approval
In GCA
Being reviewed and processed by GCA
Processed
Processing finished by GCA and a budget number assigned
Returned
Returned from routing by an approver
Withdrawn
Withdrawn from routing by an advance owner/editor
Denied
Denied by GCA; only applies to extension requests
The advance requests display in descending order by Date Created, so the newest one is at the top of the list. The data columns, left to right, are:
Advance # – unique identifier, select this to open the advance
Type – values are: New, Renewal, Extension
eCG1 # – the associated eGC1
PI Name – the principal investigator’s name
Sponsor Name – the sponsor from the eGC1
Status – the current status
Date Created – the date this advance was created
Budget # – the budget number assigned by GCA
Options – when applicable, an Extend link displays which opens an extension request for the advance. This applies to processed advances that have a start date within the past 18 months.
Clicking on a column header will sort the list by that value in descending order. Clicking a second time will reverse the sort. Note that the Type and Options columns cannot be sorted.
Your list will only include advances that you have direct access to as an owner or collaborator. Access to an advance budget request initially originates from the parent eGC1.
If you are an owner of the parent eGC1 or you have assigned access, you can open an advance budget request for that eGC1.
If you are a Global Editor, you first need to have direct access to the eGC1 in order to create an advance budget request. To update your access, start on the Approval Flow page of the eGC1. Click on the View eGC1 link to open the eGC1. On the Contacts & Assign Access page, use the Add Another User link in the Access section to assign yourself Read Write access.